Get the latest listings directly to your inbox!
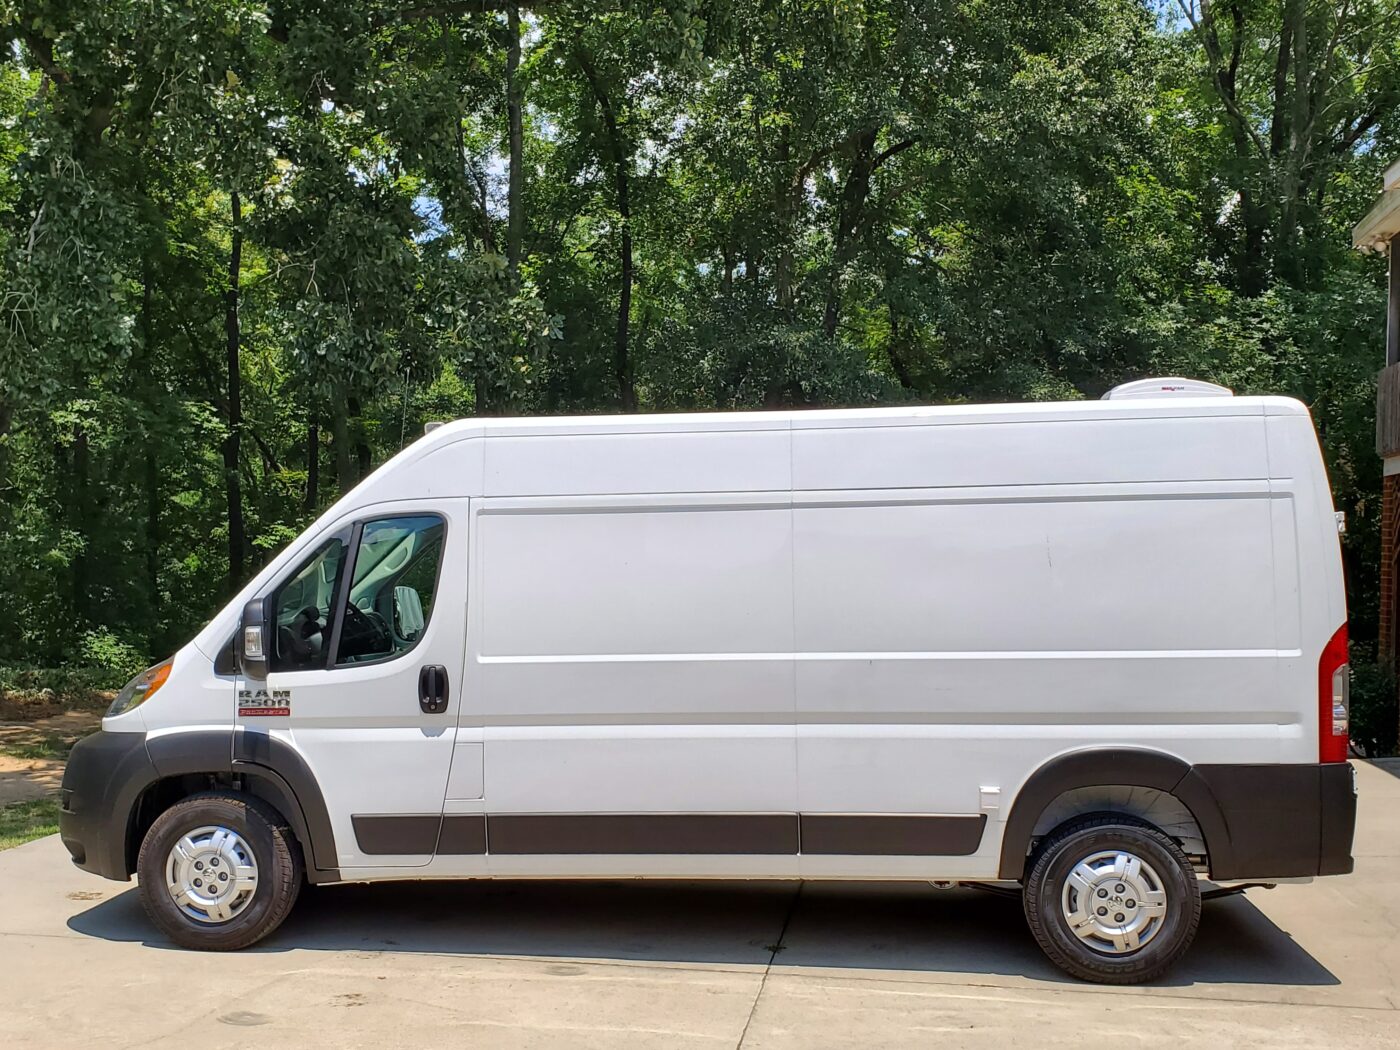
Currently the odometer reads less than 9000 miles, and it really is not moving much (I drive it periodically so it does not just sit). Located in South Carolina. Kept in a car port, out of the elements. I am pretty firm on the price. Title in hand. It has the interior convenience package and the tow package (with class IV hitch).
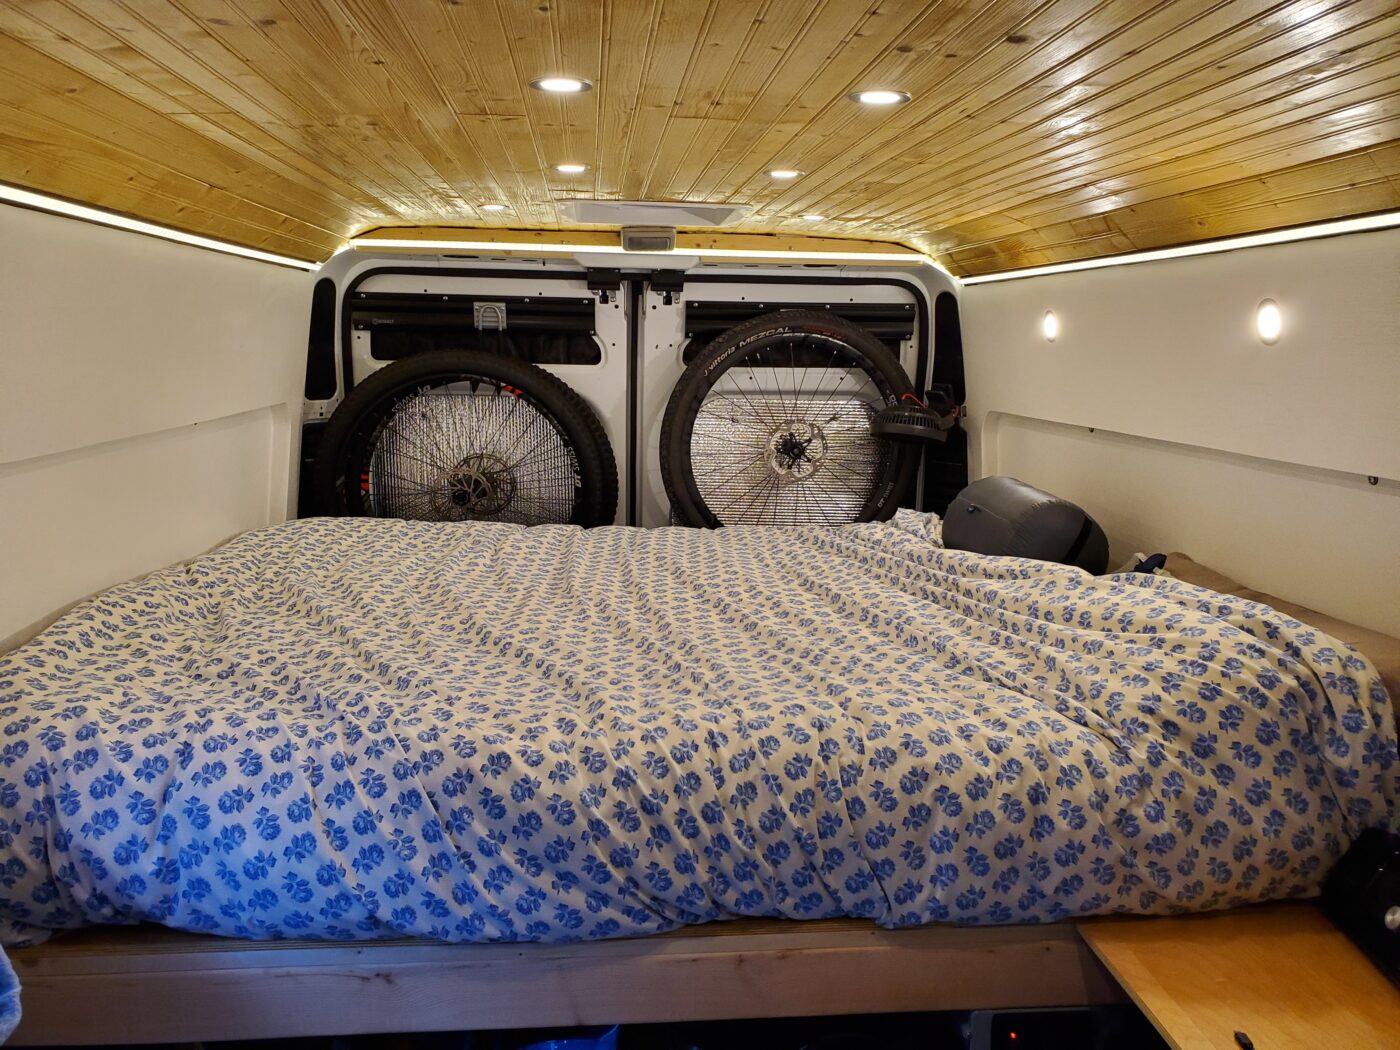
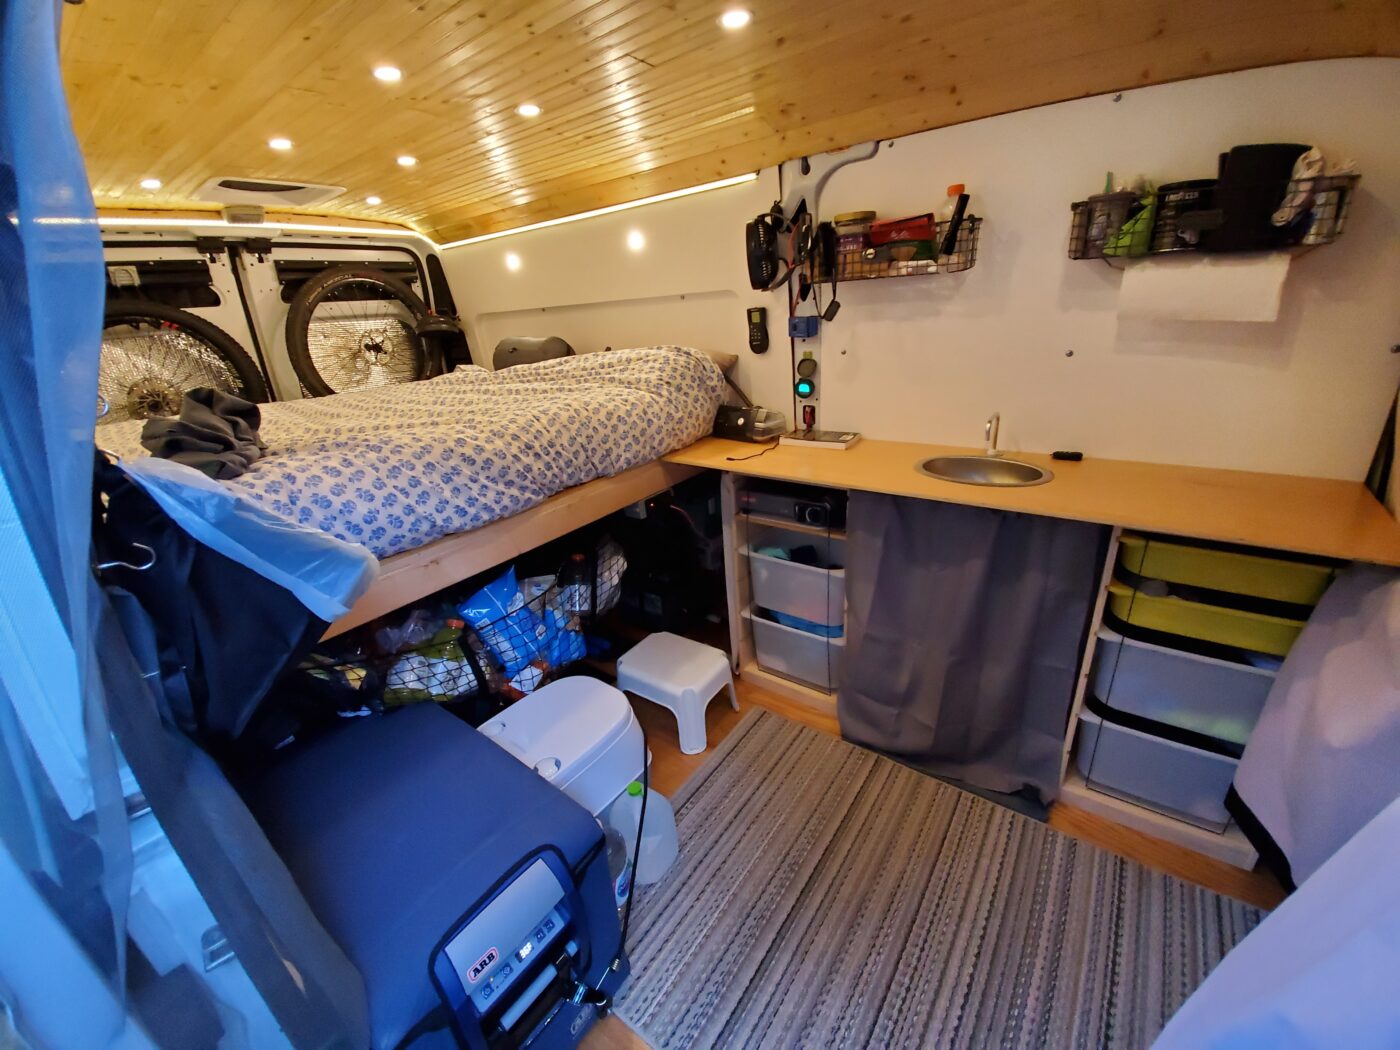
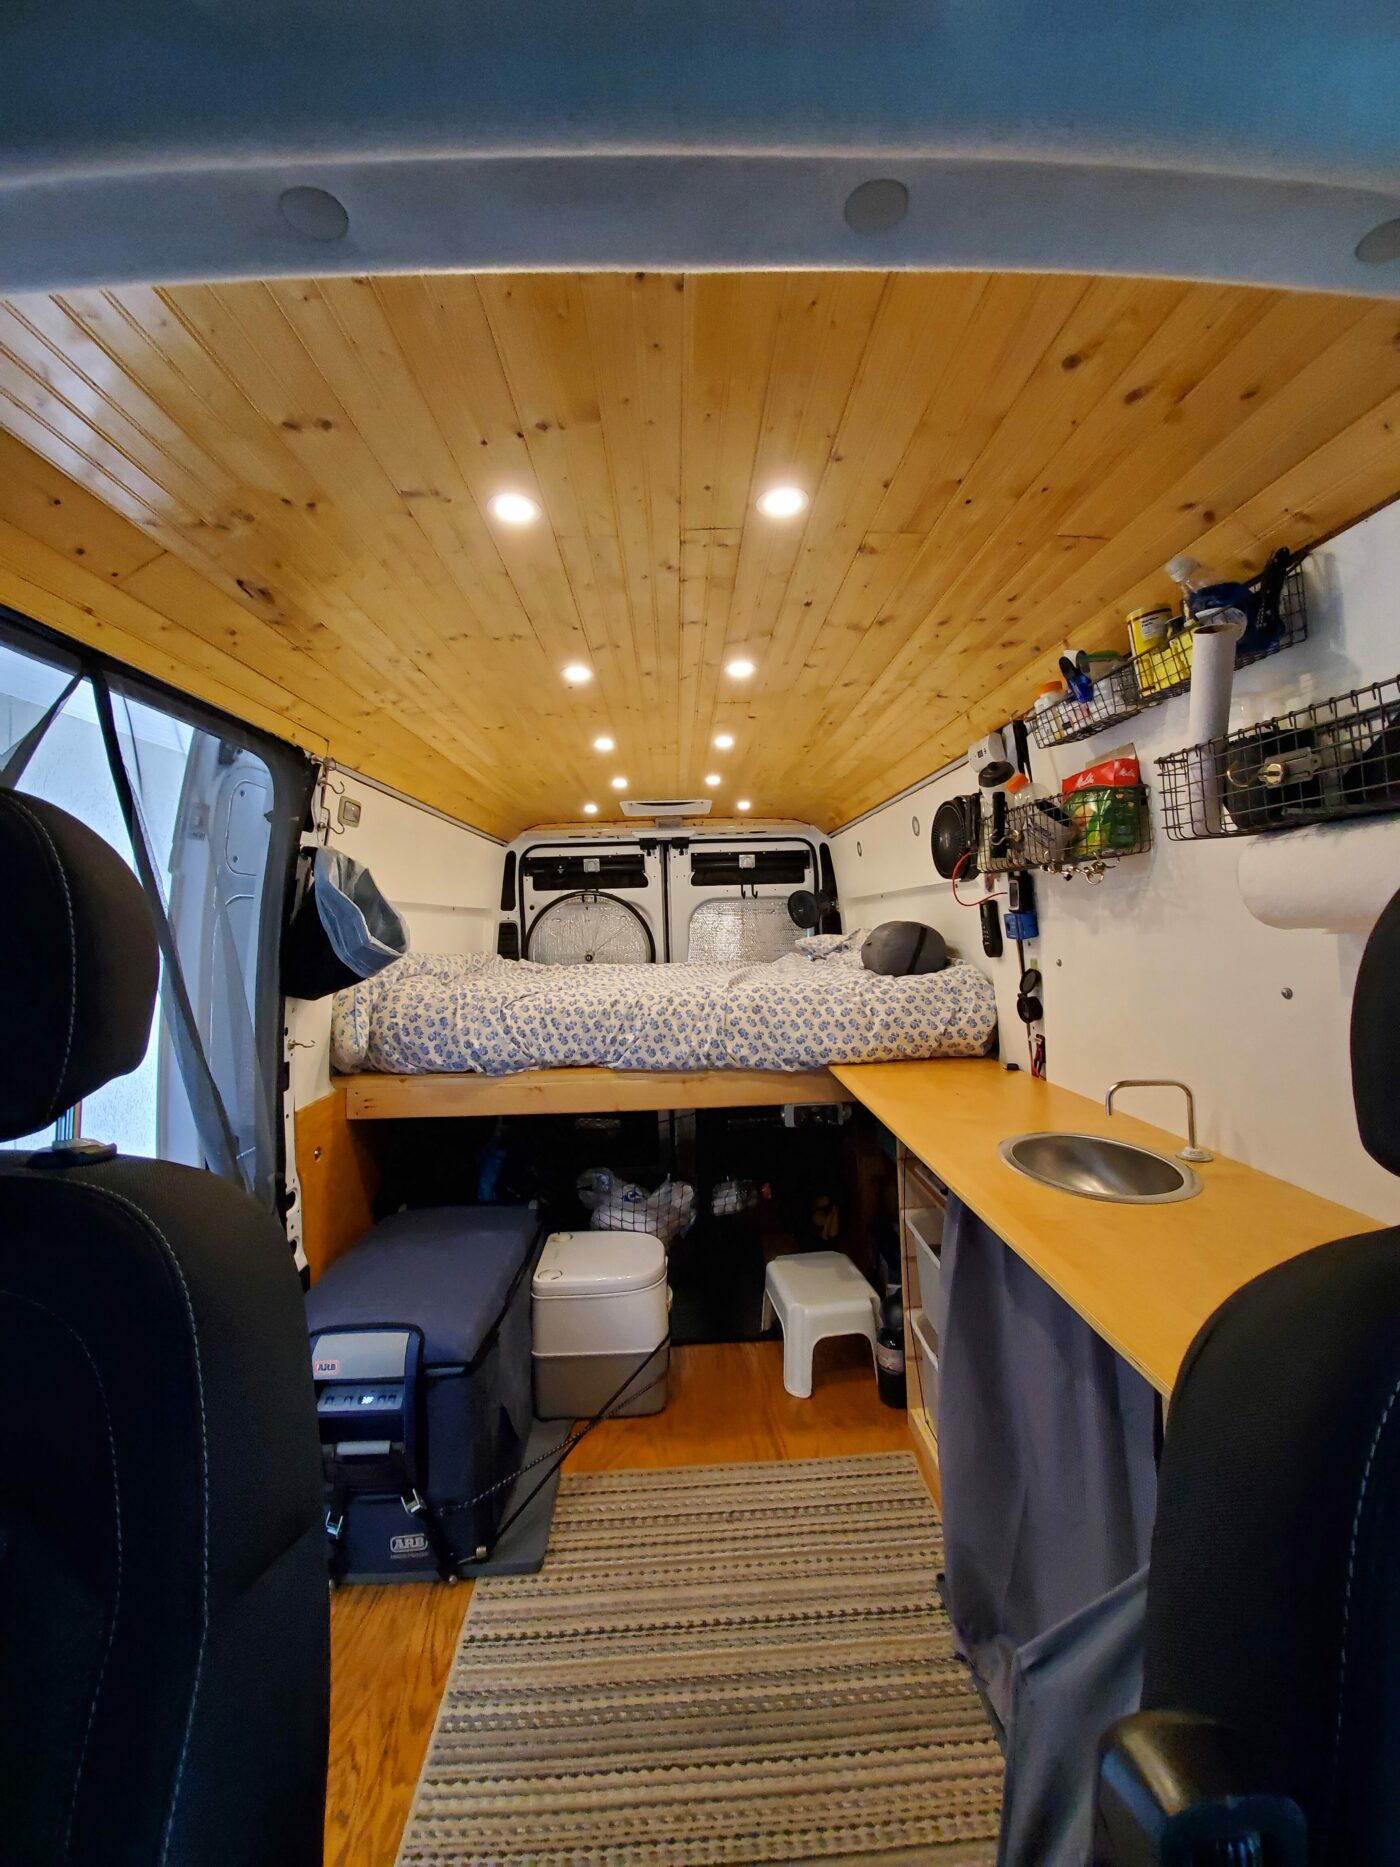
The key words for this build are simple, solid, and functional. But no expense was spared in the build, and hundreds of hours were devoted to researching, designing, and building. The main mission was to have a van to transport bicycles, and they are stored on fork mounds in the garage area under the bed. I fit my Yeti MTB no problem, by simply dropping the dropper post. I have to drop the seatpost on my road bike (one 5mm bolt) into the frame. My wife’s road bike fits without dropping the seat.
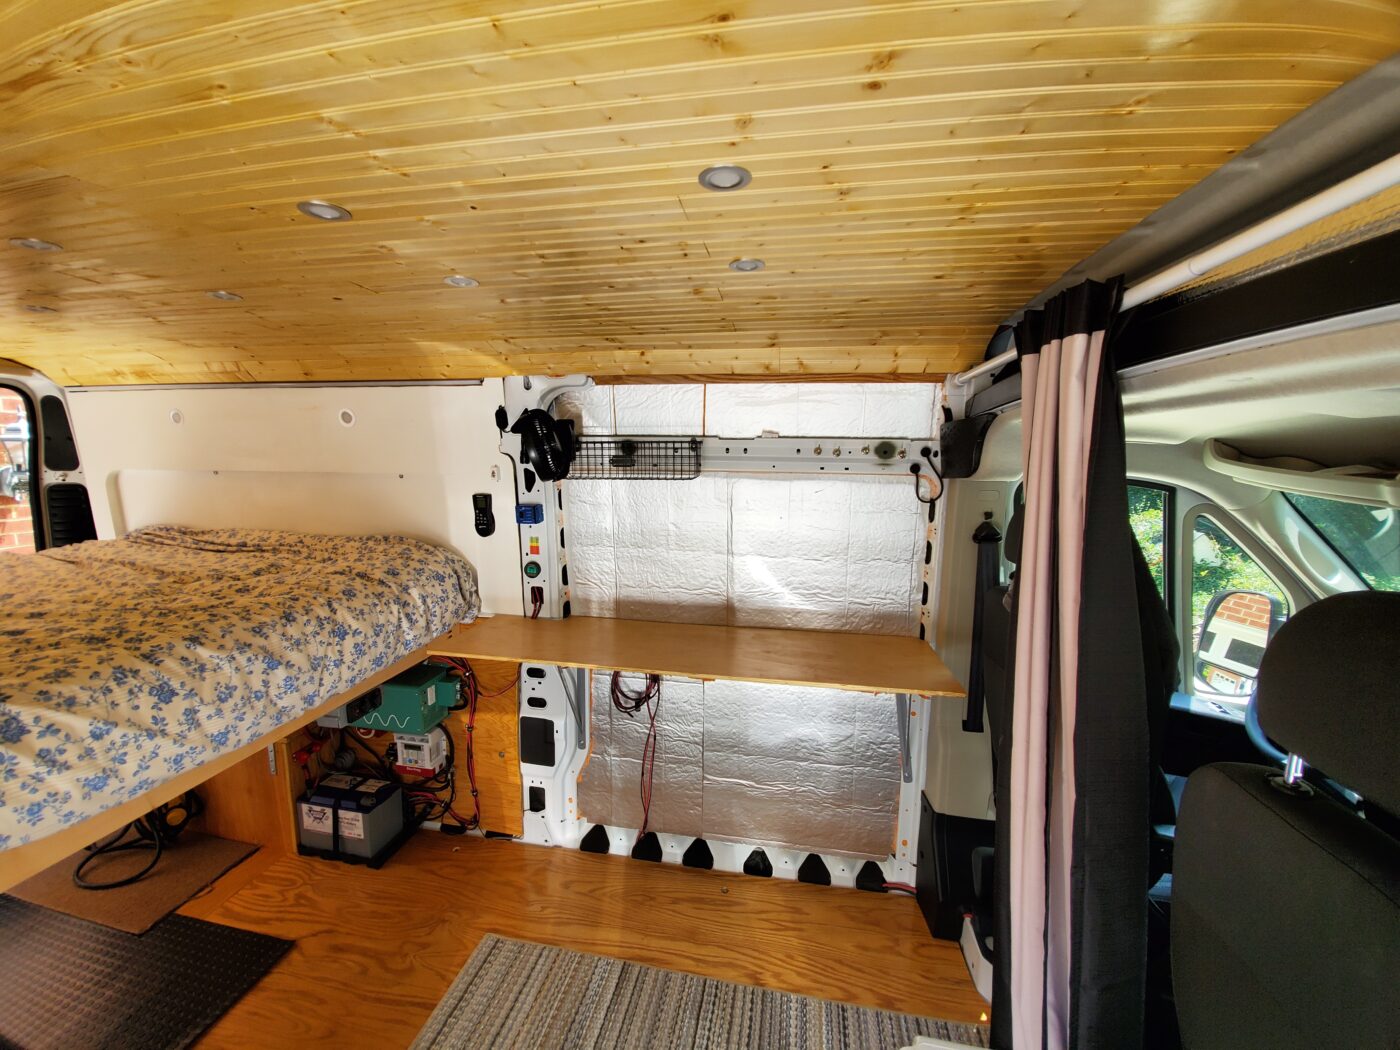
The van has full Killmat sound insulation, multiple layers of polyiso in the walls and ceiling, with thinsulate in any areas where needed (like doors, roof, even above the cab, and in the ribs). Ceiling is knotty pine tongue and groove, walls are 3/4″ oak plywood (lower walls) and white painted luan (upper walls). Floor is Killmat, XPS foam insulation topped with 3/4″ oak plywood. All wood is sealed with polyurethane (multiple coats).
The bed is suspended by the edges, creating a huge, completely open garage area below, unobstructed by upright supports. There is LED strip lighting under the bed for the garage area. It is an RV Queen bed oriented across the van. The bed sits into alcoves built into the walls. The mattress is a made-in-USA American Mattress Company RV queen, wrapped in a sealed (yet breathable) liner.
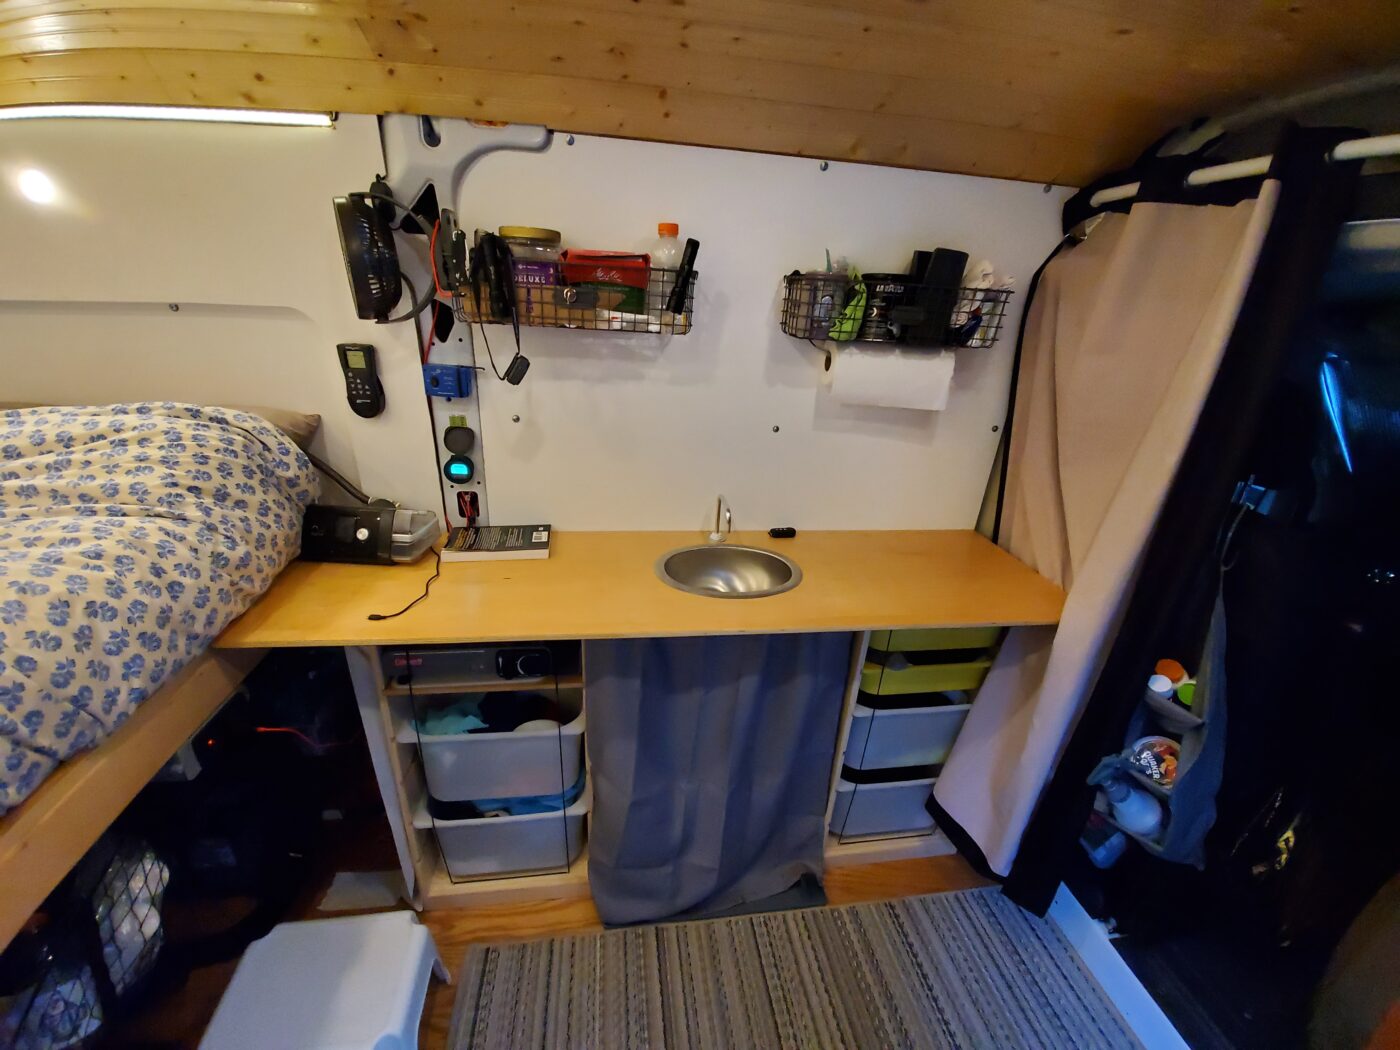
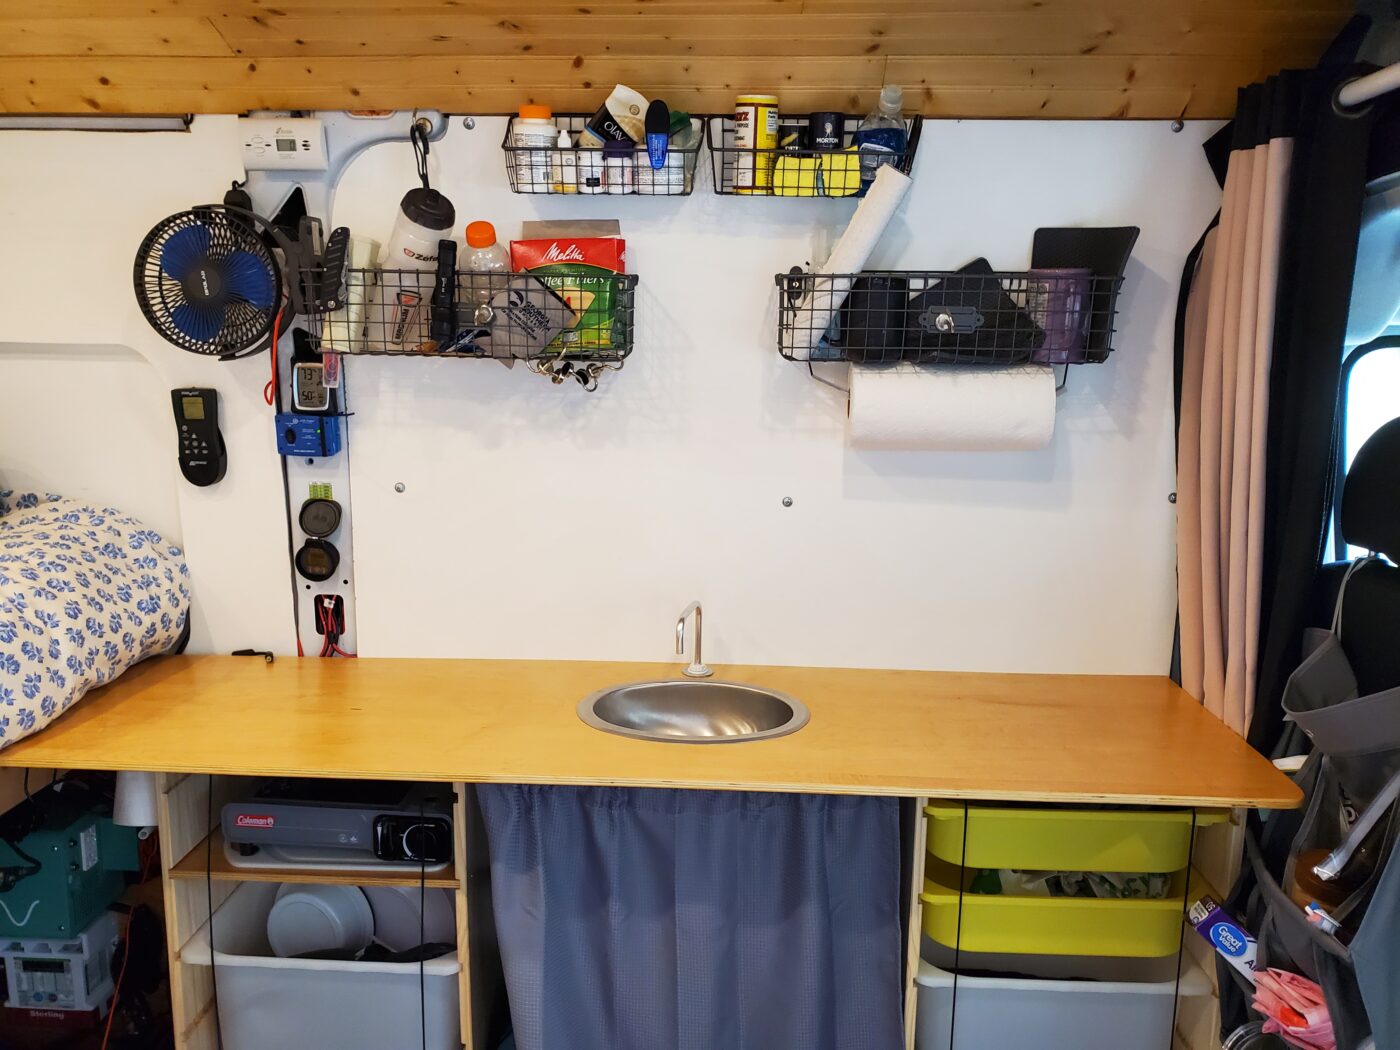
There is a simple drawer system under the kitchen counter. The drawers can be removed easily and taken inside to load/unload provisions, equipment or clothes. There are simple (but effective) wire racks above the kitchen counter. This allows you to see everything, making it easy to replenish provisions or find something quickly. Storage is augmented by shoe storage pouches on the back of each seat. The pouches on the passenger seat are easily accessed from the slider (or the front passenger door if the seat is swiveled). A large net is hung under the front edge of the bed to provide additional storage. This is also easy to see through to find things.
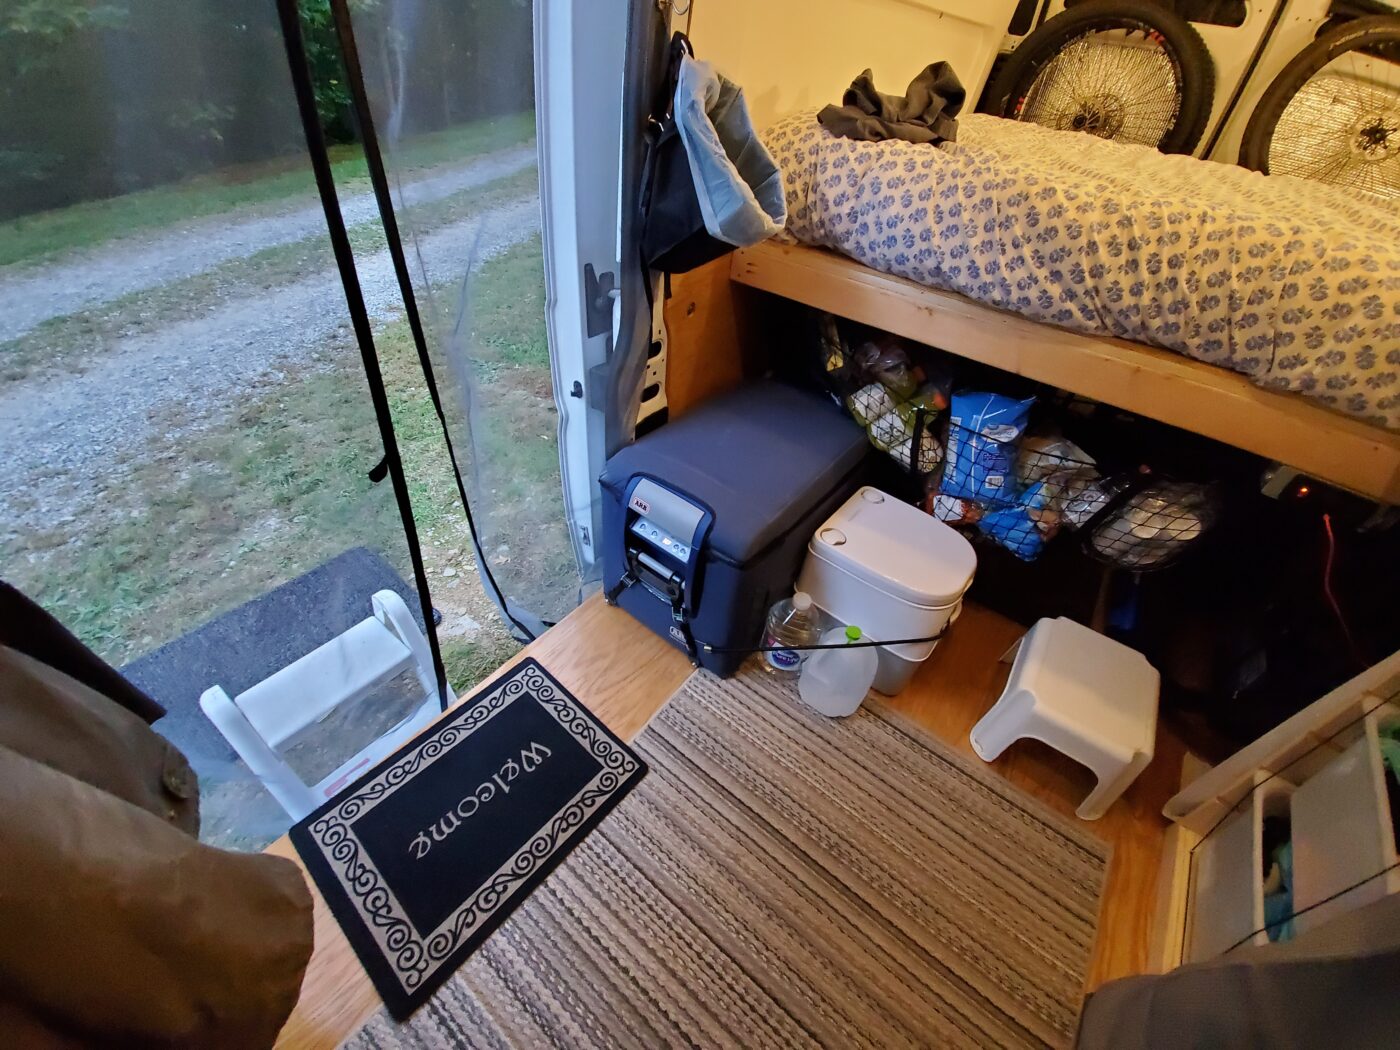
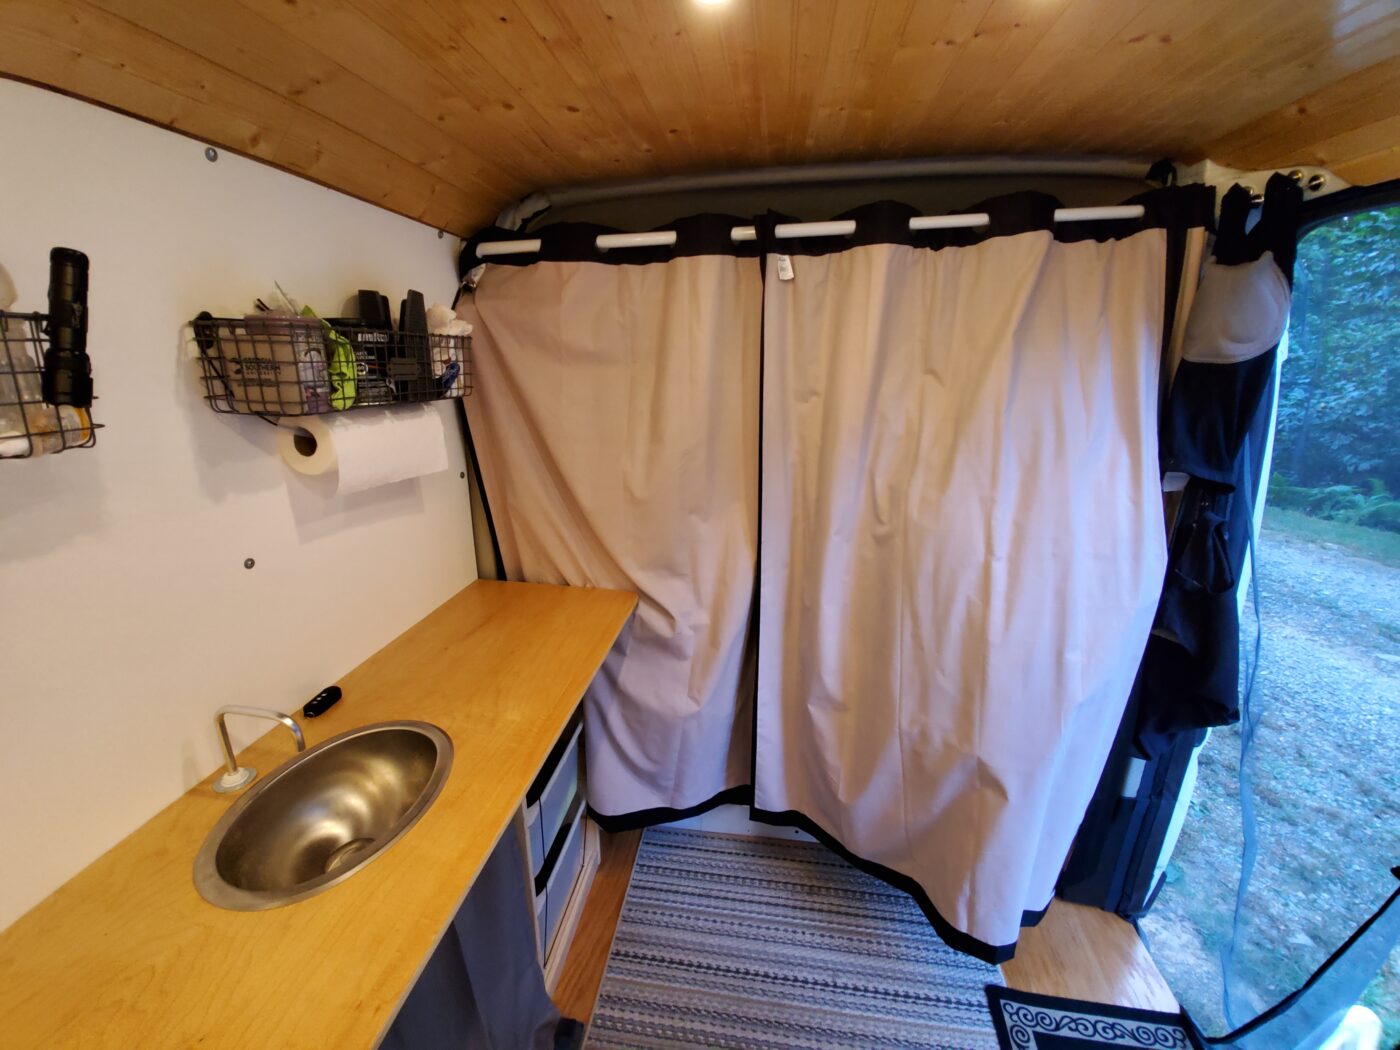
The plumbing is limited to a simple small sink and a Whale Gusher foot pump, connected through a simple hose system to a 5 gallon Primo water bottle which is lashed under the sink. This is easily replenished throughout the country in nearly every grocery store or big box store (and many gas stations). Grey water is held in a 6 gallon jerry can lashed next to the primo bottle under the sink. This is super easy to keep clean, winterize and otherwise maintain, and it works really well. The foot pump allows easy hands-free operation and easy regulation of water flow.
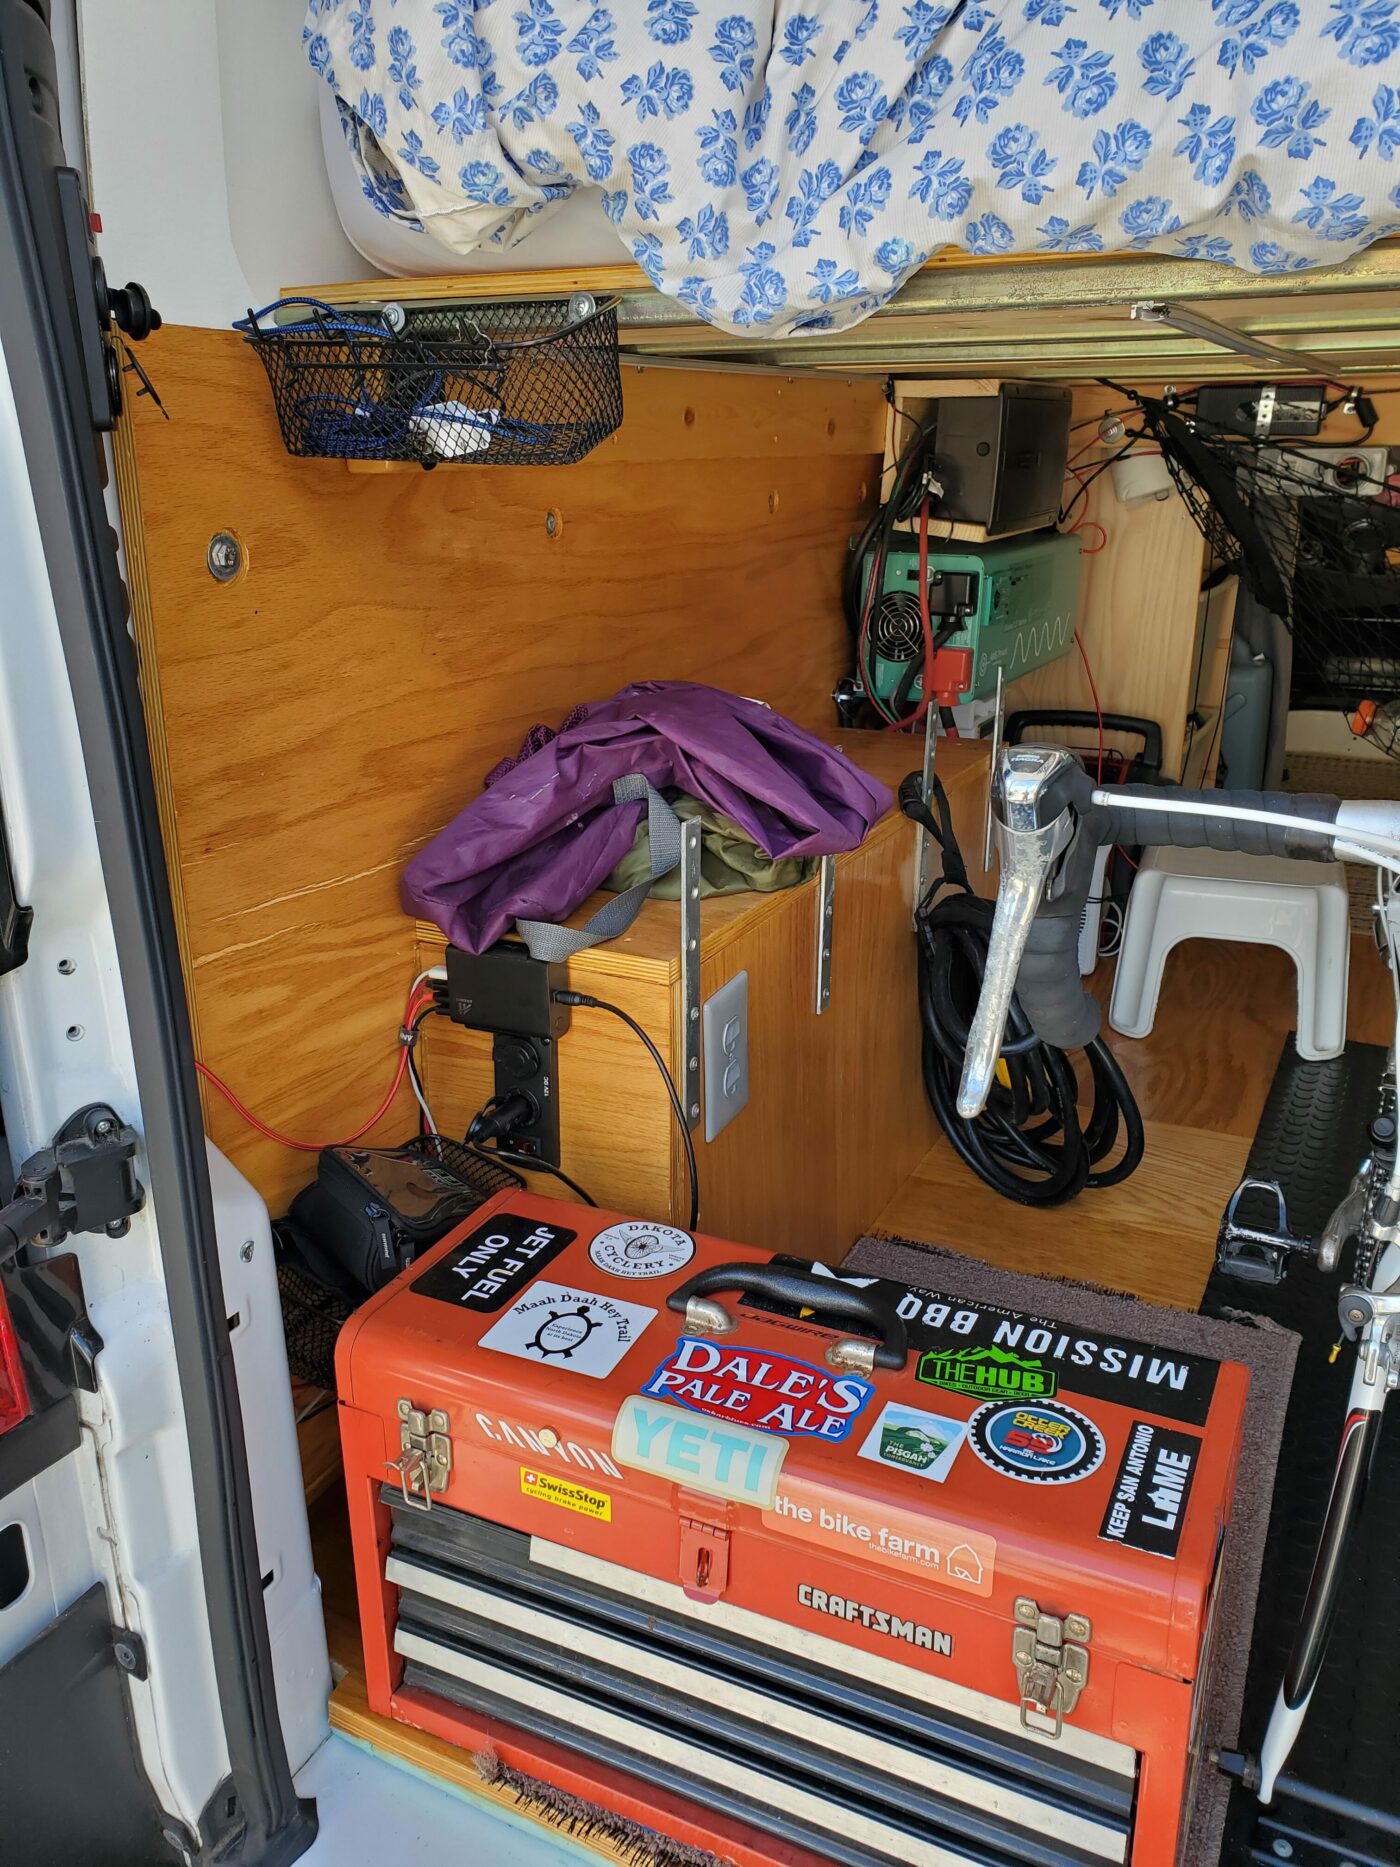
The electrical system was designed for future expansion, should it be necessary. Lots of “extra runs” of 10g stranded wire was run anywhere I though that it may be needed. In particular, 110v runs are provided to front and rear fan locations (for AC if it is ever installed), plus 12v lines run to the kitchen counter area, the rear above doors area, and to both front and rear fan locations. All of the wire runs are labeled at both ends. The system is powered by a 100ah BattleBorn Lion house battery, which is charged by a Stirling 60 amp battery to battery charger while the van is running. The house battery can also charge via the AIMS inverter-charger while connected to shore power. There is no solar power, although there are wire runs in place should you decide to add it in the future. The AIMS 2500w inverter charger is mounted to the drivers-side wall under the bed. All of the main wiring terminates in this area. There is room for additional batteries in this area without sacrificing much (if any) floor space. All 100v and 12v power is regulated through an RV fuse (12v) breaker (110v) distribution center. There are additional breakers or fuses where indicated. I ran a 100v line back to a regular plug in the rear garage area. There is also 12v charging located in the garage area and on the rear pillar. More 12v power located in the front bed/galley area. I designed and installed the electrical system myself, but I had an electrical engineer review my system (including the specs of all of the components to make sure it is safe and sound. ALL of the electrical components are surface installed with easy access under the bed, for any future maintenance. It is easy to access everything!
I have installed a 82 quart ARB refrigerator just inside the slider. It is wrapped in the ARB padded (insulated) cover, and is easily accessible from both inside and outside the van. I selected the 82 quart model because it is just as energy efficient as the smaller models, and I wanted the fridge to double as seating, and the 82 quart is the right height for that. It is awesome! It is hard wired into the electrical system and just sips power, even when it is really hot.
I have a MaxAire fan installed as far back on the van as practical (in case of future solar addition). I also have a Furion 14500 btu AC (complete with the inside controls/mount) still in the box. I had intended to mount this in the front fan mount area, but it would not fit in our carport, so it has never been installed, the roof has not been cut for it, but there are 12v and 110v lines running to that area for future use (they are now tucked into the nearest puck light in the ceiling). They are included in the sale of the van. No discount if you do not want the AC.
Lighting consists of puck lights in the ceiling, controlled by a dimmer near the slider (B pillar). There is also reading lights installed in the drivers side wall over the bed, controlled by a simple switch near the front of the bed. There is valance lighting composed of an LED strip inside an aluminum and plastic channel, controlled by a dimmer bear the front of the bed. I installed this as a lark, and it has proven to be the most used lighting in the van. There is also LED light strips installed in the garage area, controlled by a dimmer near the rear door.
There are hooks on the rear doors designed to secure the front wheels of the bikes (with room for spares). Plus probably a lot I am forgetting.
I will hate to see this van go, as it has been a labor of love building, but as I said, we are simply not using it.
My van build thread can be found on the Promasterforum.com in the Adventuremobile Build Thread.
https://www.promasterforum.com/threads/adventuremobile-build.93409/